Tallow Soap Recipe: How to Make Beef Tallow Soap from Scratch
Reader-supportedTallow soap recipe for beginners: a 100% beef tallow bar plus four blends with exact lye and water weights, lye safety, trace, gel phase, and cure times.

This post contains affiliate links. We may earn a commission if you purchase through these links, at no extra cost to you.
Tallow soap is made by stirring a sodium hydroxide (lye) solution into melted beef tallow, blending until the mixture thickens to “trace,” pouring it into a mold, and curing the cut bars for 4 to 6 weeks. The basic recipe on this page uses 16 oz (454 g) of tallow, 61.2 g of lye, and 172 g of distilled water at a 5% superfat, and it makes six to eight bars. Four blended tallow soap recipes follow for more lather, a milder face bar, shaving soap, and salt bars.
The first batch of tallow soap I made took two hours, ended up soft and oily, and taught me more about soap chemistry than months of reading. The second batch came out right. Everything below is written so your first batch goes like my second one.
Tallow Soap Recipes at a Glance
Every recipe is sized to 16 oz (454 g) of total oils so you can compare them directly. The lye numbers were checked against the NaOH saponification values most calculators use: beef tallow 0.142, coconut oil 0.183, olive oil 0.135, castor oil 0.128. Calculators differ by a percent or two, so run your exact recipe through SoapCalc or another lye calculator before you mix.
| Recipe | Oils (454 g total) | NaOH (lye) | Distilled water | Superfat | Cure | What the bar is like |
|---|---|---|---|---|---|---|
| 1. 100% tallow | 454 g tallow | 61.2 g (2.16 oz) | 172 g (6.08 oz) | 5% | 4-6 weeks, better at 8 | Very hard, mild, creamy low lather |
| 2. Tallow + coconut | 340 g tallow, 114 g coconut | 65.7 g (2.32 oz) | 172 g | 5% | 6-8 weeks | More bubbles, everyday family bar |
| 3. Tallow + olive | 340 g tallow, 114 g olive | 60.5 g (2.13 oz) | 172 g | 5% | 8-12 weeks | Milder, slicker, good for face washing |
| 4. Shaving soap | 318 g tallow, 113 g coconut, 23 g castor | 65.3 g (2.30 oz) | 172 g | 5% | 6 weeks | Dense, stable lather |
| 5. Salt bar | 363 g coconut, 91 g tallow + 454 g salt | 65.1 g (2.30 oz) | 172 g | 18% | 6-12 weeks | Hard, exfoliating, creamy lather |
If you are new to soap, make Recipe 1 or Recipe 2 first. Recipe 2 is the more forgiving of the two because coconut oil speeds up trace a little and adds lather that pure tallow lacks.
What Tallow Soap Is: Sodium Tallowate and Saponified Tallow
When lye reacts with the triglycerides in tallow, it splits them into glycerin and the sodium salts of tallow’s fatty acids. Those salts are the soap. On an ingredient label they appear as sodium tallowate, which is the standard cosmetic (INCI) name for soap made from tallow and sodium hydroxide. Handmade sellers often write “saponified tallow” or “saponified beef tallow” instead. They mean the same thing: tallow that has been turned into soap, with no free lye left in a correctly made bar.
Potassium tallowate is tallow saponified with potassium hydroxide (KOH) instead. Potassium soaps are softer, so KOH is used for liquid soap, soft soap, and some shaving creams. Everything on this page uses sodium hydroxide for hard bars.
Handmade cold process soap keeps its glycerin in the bar. Many commercial bars sell the glycerin off or remove it during processing, which is one reason handmade tallow bars feel different from drugstore soap. Sodium tallowate is still the first ingredient in some mass-market bars today, so the fat itself is familiar to most people who have ever used bar soap.
For more on why tallow’s fatty acid mix makes such a hard, long-lasting bar, the tallow soap properties and buying guide covers SAP values, trait scores, and which tallow to buy.
Lye Safety First, Always
Sodium hydroxide, NaOH, is the alkaline chemical that turns fat into soap. It is also a strong caustic that causes serious chemical burns. None of this is optional.
Eye protection. Splash-proof chemical goggles, not regular glasses. A drop of lye solution in an eye can cause permanent damage within seconds. Vented chemical splash goggles like the 3M chemical splash goggles seal around the eyes where safety glasses leave gaps.
Long sleeves, long pants, closed shoes. Concentrated lye solution does not always hurt right away, so a splash can do damage before you notice it. Cover your skin.
Nitrile gloves. Nitrile holds up to lye well through a soap session.
Always add lye to water, never water to lye. Pouring water onto a pile of lye can cause a violent reaction that throws hot caustic solution out of the container. Adding lye crystals to water slowly lets the heat build without splashing. Remember it as “lye into water.”
Ventilate. Dissolving lye gives off caustic fumes for the first 30 seconds or so. Work by an open window or under a running vent hood, and do not lean over the container.
Know the first aid before you start.
- Lye on skin: rinse with plenty of cool running water for at least 15 minutes. Do not put vinegar on skin burns.
- Lye in an eye: flush with clean running water for at least 15 minutes, holding the eyelid open, and get medical help right away. In the US, Poison Control is 1-800-222-1222. Never put vinegar in an eye.
- Spills on counters and tools: wipe up, then a little white vinegar can neutralize the residue on hard surfaces.
Children and pets out of the room. The roughly 90 minutes you are working with lye solution and raw soap batter is not the time for interruptions.
Label the lye solution. A jug of lye solution looks exactly like a jug of water. Label it the moment you mix it and set it where it cannot be knocked over.
Buy pure sodium hydroxide. Use lye sold as 100% sodium hydroxide, such as Essential Depot food grade sodium hydroxide. Drain cleaners that contain other ingredients will ruin the recipe and the math.
If this section convinces you soap is not your project, that is a fine outcome. Tallow balms, lotion bars, and body butter need no lye at all. The tallow balm recipe and the salve guide are good lye-free starting points.
Equipment List
Anything that touches lye or raw soap should be dedicated to soap making and not go back into food use.
Stainless steel pot, 2 quarts or larger. Stainless or enameled cast iron only. Aluminum reacts with lye and ruins both the pot and the soap.
Heat-resistant container for the lye solution. A heavy polypropylene (#5 plastic) pitcher or a sturdy stainless container. Thin plastic can warp from the heat, and glass can weaken with repeated lye use.
Stick blender. This turns a four-hour hand-stirring session into a few minutes of blending. A basic immersion blender like the MuellerLiving Ultra-Stick hand blender has the stainless shaft you want. Dedicate it to soap.
Digital scale. Soap is measured by weight, never by volume. A scale that reads in 1 gram increments, like the Etekcity food kitchen scale, is accurate enough for a 16 oz batch: a 1 g error on 61 g of lye is under 2%, well inside a 5% superfat. For small test batches and essential oils, a 0.1 g scale such as the Etekcity 0.1 g bowl scale is worth having.
Silicone loaf mold. Silicone releases without lining. The DD-life silicone loaf mold with wooden box is the common beginner setup, and the wooden box keeps the thin silicone walls from bowing and holds in heat during gel phase. The 16 oz recipe below makes about 24 oz of soap batter, so it fills a standard 42 oz loaf mold a little over halfway. Scale the recipe by 1.75x to fill one completely, and run the new numbers through the calculator.
Thermometer. An instant-read probe like the ThermoPro TP19 lets you check both the lye solution and the melted tallow. Wipe the probe between readings.
Safety gear. Goggles, nitrile gloves, long sleeves, closed shoes. An apron helps.
Silicone spatula, measuring spoons, white vinegar for wiping down surfaces.
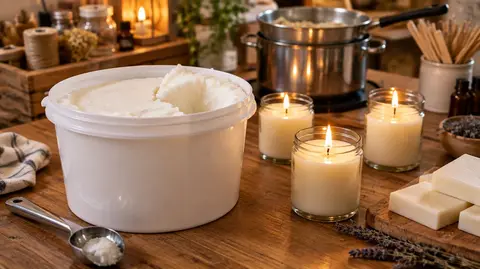
Tallow. Use clean, well-rendered tallow with no meat particles or water. The 4 lb grass-fed tallow tub covers four batches of the basic recipe with some left for cooking. The Traverse Bay 32 oz deodorized tallow is the more neutral base if you plan to scent the bars. If you render your own, strain it through cheesecloth and then a coffee filter using the steps in the tallow filtering and straining guide. Leftover protein bits can go rancid in a finished bar.
Recipe 1: Basic 100% Tallow Soap
This is the beginner recipe, and it is the one the step-by-step method below walks through.
Ingredients
- 16 oz (454 g) rendered beef tallow
- 2.16 oz (61.2 g) sodium hydroxide (NaOH)
- 6.08 oz (172 g) distilled water
- Optional: up to 0.5 oz (14 g) essential oil, added at trace. Stay within the usage rate your essential oil supplier lists for soap.
The numbers behind it
Beef tallow needs about 0.142 g of sodium hydroxide per gram to saponify completely, so 454 g of tallow would take about 64.5 g of lye with nothing left over. This recipe uses 5% less, 61.2 g. That 5% is the superfat: a small share of the tallow stays unsaponified in the finished bar, which makes it gentler and gives a margin of safety against small weighing errors. Much above 8% superfat, a tallow bar gets softer and more prone to going rancid.
The water is 38% of the oil weight, a common starting point for cold process soap. Less water speeds hardening but raises the risk of overheating in gel phase. More water gives more working time and a longer cure.
If you change anything, recalculate before you mix. Eyeballed lye gives you either a greasy bar that never sets or a harsh bar that is unsafe on skin.
Step-by-Step Method
This is the cold process method. Hot process, which cooks the batter to finish saponification faster, is covered briefly further down.
Step 1: Set Up
Clear the counter and get every tool and ingredient out before you start. Put on goggles, gloves, and long sleeves. Open a window or turn on the vent hood. Keep children and pets out.
Weigh the tallow into the stainless pot. Weigh the lye into a small, dry container. Weigh the distilled water into the lye-safe pitcher.
Step 2: Make the Lye Solution
In the ventilated spot, slowly pour the lye into the water while stirring gently with a stainless or silicone utensil. The solution heats quickly, often past 180°F, and gives off fumes for the first 30 seconds. Keep your face back.
Stir until the lye dissolves completely, usually under a minute. The solution turns cloudy and then clears. Label it and set it somewhere safe to cool to roughly 100 to 120°F, which takes 30 to 60 minutes.
Step 3: Melt the Tallow
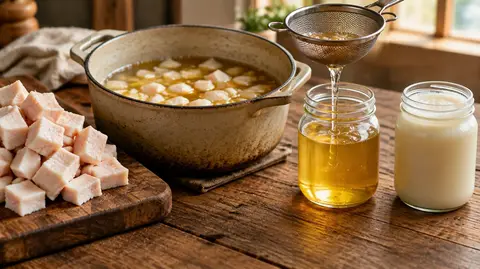
Melt the tallow over low heat until it is completely clear with no solid flecks, then take it off the heat. Tallow finishes melting in roughly the 104 to 122°F range depending on the source, so make sure it is fully liquid before it cools.
Aim to have the tallow and lye solution both between about 100 and 120°F and within 10 to 15 degrees of each other. With high-tallow recipes, stay toward the warm end. If tallow cools below its melting range during blending, it starts to solidify and thicken, which looks like trace but is only the fat setting up (“false trace”). Gently rewarming fixes it.
Step 4: Combine
Goggles and gloves on. Pour the lye solution into the melted tallow in a slow, steady stream down the side of the pot or over the head of the stick blender held in the pot. Do not pour from a height.
Blend in short bursts of 5 to 10 seconds with stirring in between. Pulsing keeps the motor from overheating and keeps air bubbles out of the soap. The mixture goes from two clear layers to cloudy to opaque. Within a few minutes it reaches trace.
Step 5: Recognize Trace
Trace is the point where the batter has emulsified and will not separate back into oil and lye. When you drizzle a little batter across the surface, the line stays visible on top for a moment instead of sinking straight in.
- Light trace: thin, drizzle barely visible. Best for adding scent and pouring. Aim for this on a first batch.
- Medium trace: pudding texture, drizzle leaves a clear trail. Still pours well.
- Thick trace: mashed-potato texture. Too thick for a clean pour.
Stop blending as soon as you reach light trace.
Step 6: Add Scent or Additives (Optional)
Stir in essential oil by hand with the spatula for 15 to 20 seconds. Skip the stick blender at this point, because some oils speed trace dramatically. Lavender and peppermint behave well for beginners. Citrus oils fade quickly in cold process soap unless anchored with a heavier oil like cedarwood.
Other additions at trace:
- Honey: about 1 teaspoon per pound of oils, dissolved in a little warm water. Honey adds sugar, which makes the batter heat up more in gel, so keep the mold uncovered if it starts to overheat.
- Colloidal oatmeal or finely ground oats: 1 to 2 tablespoons per pound of oils for a mild scrubby texture.
- Clay (such as bentonite or kaolin): 1 to 2 teaspoons per pound of oils, mixed into a slurry with a little water first.
Keep total additives modest. Too much of anything interferes with lather and hardness.
Step 7: Pour Into the Mold
Pour the batter into the mold, tap the mold on the counter to release air bubbles, and smooth the top. Cover it with a piece of cardboard and a towel to hold in heat, which encourages gel phase.
Step 8: Gel Phase
Over the next 24 to 48 hours the soap heats up from the ongoing reaction, and most of the saponification finishes. The center often turns darker and translucent for a few hours before going opaque again as it cools. Leave it alone. It will be warm for the first 12 to 18 hours, firm to a light touch at about 24 hours, and ready to unmold around 48 hours.
Step 9: Unmold and Cut
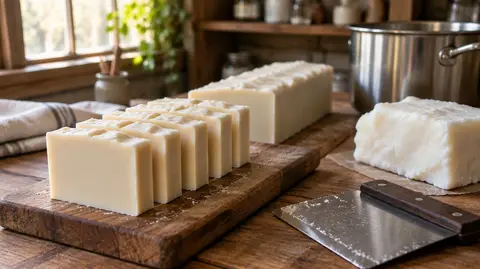
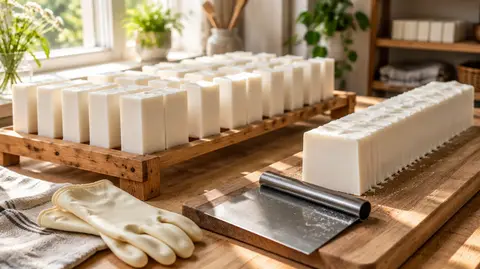
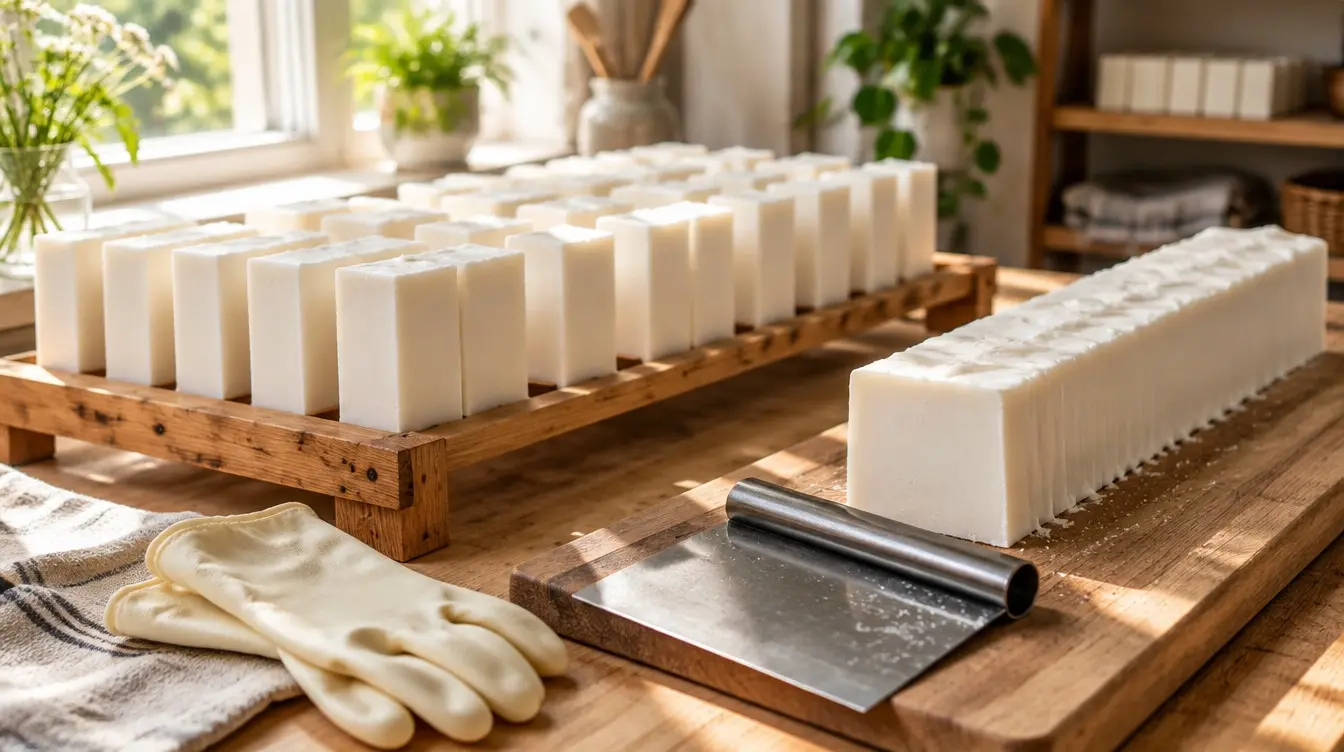
Pull the silicone away from the sides and push the block out. If it sticks or feels soft, give it another 12 to 24 hours. Cut 1-inch bars with a sharp knife or a wire cutter. Keep gloves on for this step: the reaction is nearly done, but fresh soap can still irritate skin.
Step 10: Cure
Set the bars on a rack or a parchment-lined tray with air around every side, out of direct sun, for 4 to 6 weeks. During cure the leftover water evaporates, the bar hardens, and the lather improves. A tallow bar used at one week is soft and lathers poorly. The same bar at four to eight weeks is hard and long-lasting. Write the cut date on a piece of tape next to the batch.
More Tallow Soap Recipes
These four recipes use the same method as Recipe 1. Melt all the oils together, bring them and the lye solution to 100 to 120°F, blend to trace, pour, insulate, unmold, and cure. Each one lists its oil weights and the lye calculated at the SAP values stated above the table. Run every recipe through a lye calculator before you mix, because oil batches and calculators vary slightly and a typo in a recipe is the most common cause of a lye-heavy bar.
Recipe 2: Tallow + Coconut (Lather Boost)
Coconut oil supplies lauric and myristic acid, which tallow has little of, so this bar makes noticeably more bubbles than 100% tallow while staying hard and mild. It is the classic combination for an everyday family bar.
- Beef tallow: 12 oz (340 g)
- Coconut oil (76°F): 4 oz (114 g)
- NaOH at 5% superfat: 2.32 oz (65.7 g)
- Distilled water: 6.08 oz (172 g)
Cure 6 weeks minimum, 8 weeks better. Coconut raises the cleansing score, so if you have dry skin you can raise the superfat to 7% (recalculate the lye).
Recipe 3: Tallow + Olive (Mild Bar)
Olive oil adds conditioning and gives a slicker, gentler bar that many people prefer for face washing. It traces more slowly and needs a longer cure to harden.
- Beef tallow: 12 oz (340 g)
- Olive oil (pure or pomace): 4 oz (114 g)
- NaOH at 5% superfat: 2.13 oz (60.5 g)
- Distilled water: 6.08 oz (172 g)
Cure 8 to 12 weeks. Be patient at the blending stage, since olive oil slows trace.
Recipe 4: Tallow Shaving Soap (Tallow + Coconut + Castor)
Tallow gives the lather body, coconut adds cleansing and bubbles, and castor oil helps the lather hold water so it stays stable through a shave. Bentonite clay adds slip.
- Beef tallow: 11.2 oz (318 g)
- Coconut oil (76°F): 4 oz (113 g)
- Castor oil: 0.8 oz (23 g)
- NaOH at 5% superfat: 2.30 oz (65.3 g)
- Distilled water: 6.08 oz (172 g)
- Bentonite clay: 1 tablespoon mixed into a slurry with a little water, added at trace
- Optional: up to 0.4 oz essential oil
Blend to early trace, stir in the clay slurry, and pour into shaving mugs, pucks, or a flat mold to cut into rounds after 24 hours. Cure 6 weeks. This makes a hard puck you load with a damp brush. Many traditional wet-shaving soaps use potassium hydroxide or a KOH and NaOH mix for a softer, faster-loading soap, so treat this as a simple starting point.
Recipe 5: Coconut + Tallow Salt Bar
Most soaps lather poorly in salty water, so salt bars rely on a high share of coconut oil. The high superfat offsets coconut’s strong cleansing, and the tallow adds hardness and a creamier feel.
- Coconut oil (76°F): 12.8 oz (363 g)
- Beef tallow: 3.2 oz (91 g)
- NaOH at 18% superfat: 2.30 oz (65.1 g)
- Distilled water: 6.08 oz (172 g)
- Fine sea salt or non-iodized pickling salt: 16 oz (454 g), 100% of oil weight (you can use as little as 50%)
Blend to light trace only, then stir in the salt by hand. Pour right away into individual cavity molds, because salt bars set fast and a full loaf becomes too hard to slice. Unmold or cut within 1 to 3 hours. Cure 6 weeks minimum, 12 weeks better.
Substituting Lard
Lard is the closest fat to tallow in soap, and tallow-lard blends were a common farmhouse bar. Lard’s NaOH SAP value is about 0.138, slightly lower than tallow’s, so recalculate the lye whenever you swap any amount. Lard makes a slightly softer bar with a similar creamy lather.
Troubleshooting
Crumbly, dry bar, or a bar that stings. Too much lye, from a miscalculation or an inaccurate scale. Do not use it on skin. Discard the batch, check the scale with a known weight, and recheck the recipe in the calculator.
Soft, oily bar that never hardens. Too little lye, too high a superfat, or a humid cure room. If the recipe checks out, give it more time in a drier spot. Some batches need 8 weeks. If it is still greasy after that, the lye was short.
White powder on top. Soda ash, a harmless film of sodium carbonate that forms where raw soap meets air. Plane it off with a knife or rinse the bar. Covering the mold more closely during gel helps prevent it.
Orange or brown spots weeks later. “Dreaded orange spots” (DOS) are rancid oil in the bar. The usual causes are old or poorly stored tallow, meat particles left in home-rendered fat, too high a superfat, or humid storage. Start with fresh tallow stored as described in the tallow shelf life and storage guide.
White streaks or pockets. Lye that did not fully dissolve, or partial seizing. Streaks are usually cosmetic. Hard white pockets that feel gritty may be undissolved lye, so do not use those bars.
Batter seized in the pot. An essential oil sped up trace, or the batter was too cool (false trace). Glop it into the mold as best you can. Next time use less fragrance, choose a slower oil, and keep temperatures up.
Cracks or a tunnel down the middle. The soap overheated in gel. Common with honey and sugar additions or a heavily insulated mold. Leave the mold uncovered, or soap at cooler temperatures next time.
Air bubbles. Too much or too fast blending. Pulse in shorter bursts, keep the blender head submerged, and tap the mold after pouring.
Beefy smell in the finished bar. The tallow itself had a strong odor. Most of the smell disappears in saponification and cure, but a strongly scented tallow can carry through. Use a deodorized base or render using the methods in how to render beef tallow without the smell.
Cold Process vs Hot Process
Cold process combines lye and oils at low temperature, lets saponification finish in the mold over 24 to 48 hours, and cures bars for 4 to 6 weeks or longer. It produces smooth bars and allows swirls and layers.
Hot process cooks the batter, usually in a slow cooker, until saponification is complete, then spoons it into the mold. Bars are safe to use within days, though they still get harder and longer-lasting with a few weeks of cure. The texture is more rustic. Both methods work well with tallow, and cold process is the easier one to learn first.
Using and Storing the Bars
A 16 oz tallow batch makes six to eight bars depending on how thick you cut them. Store cured bars in a cool, dry, ventilated place with air between them. Avoid sealed plastic bags, which trap moisture. For gifts, wrap cured bars in paper or cloth.
In the shower, keep the bar on a draining soap dish. Even a hard tallow bar goes soft sitting in standing water, and a slatted dish can roughly double how long a bar lasts.
Tallow soap cleans without the tight feeling some high-coconut and detergent bars leave, which is why many people with dry skin like it. It is still soap, so if you have a skin condition, patch test it and talk to your dermatologist rather than expecting any bar to treat it.
If you plan to sell your soap in the US, the FDA’s position is that a product made of fats and alkali and sold only as soap is regulated as a consumer product, while a bar marketed with cosmetic claims such as “moisturizing” becomes a cosmetic with labeling rules. Read the FDA’s page on soap before you print labels, and check your state’s requirements.
Frequently Asked Questions
Is making tallow soap safe?
Yes, if you follow lye safety carefully. The risk is in handling the lye and raw batter, which is manageable with goggles, gloves, ventilation, and the “lye into water” rule. A correctly calculated bar that has gone through gel and cure has no free lye left and is safe to use.
Why use tallow instead of olive or coconut oil?
Tallow makes a harder, longer-lasting bar than olive oil and a milder one than coconut oil. On its own it gives a creamy, low-bubble lather. Blending it with a smaller share of coconut (for bubbles) or olive (for conditioning) lets you adjust the bar, which is what Recipes 2 and 3 do. The soap making guide and the tallow for soap making uses page cover more blend ideas.
Can I use store-bought tallow for soap?
Yes. Any pure, food-grade beef tallow with no added seasonings or preservatives works. The 4 lb grass-fed tallow tub is the right size for repeated batches, and the Traverse Bay 32 oz deodorized tallow is closer to a neutral base for scented bars. Premium cooking tallows work too, but you are paying for flavor that saponification removes. To render your own, follow the step-by-step tallow rendering guide and strain twice.
How long does tallow soap last?
A cured bar stored dry keeps for a year or more, and tallow bars often get harder and milder with age. The scent from essential oils fades over time. In daily shower use, a well-cured tallow bar lasts longer than most commercial bars of the same size because it is so hard.
Does tallow soap smell like beef?
Not when it is made from clean, well-rendered tallow. Saponification changes the fat into soap, and unscented tallow soap smells mild and clean. A strongly beefy tallow can leave a faint note, which is why deodorized tallow is popular for soap.
What essential oils work in tallow soap?
Lavender, cedarwood, peppermint, eucalyptus, rosemary, tea tree, and sandalwood are all common. Keep total essential oil within your supplier’s stated maximum for soap, which is often around 3% of oil weight or less.
Why are my bars still soft after 4 weeks?
Either the cure space is humid, or the recipe has a high share of soft oils like olive or castor. Move the bars to a drier spot with more airflow and give them time. A 100% tallow bar should be firm by 4 weeks. A high-olive bar may need 8 to 12.
Bottom Line
A good first tallow soap needs clean tallow, pure sodium hydroxide, a digital scale, a stick blender, a mold, and proper safety gear. Start with Recipe 1 or Recipe 2, recalculate any change in a lye calculator, respect the lye, and give the bars the full cure.
For picking a tallow, the best beef tallow for soap making guide compares bulk and deodorized options and explains tallow’s soap properties in more depth. The soap making guide has more variations, and the shaving cream and hand cream guides are related projects that use the same tallow.
Explore more tallow guides
Browse our collection of recipes, comparisons, reviews and DIY tutorials.
View all guidesKing Tallow is reader-supported. We research and test the products we recommend, and when you buy through links on this page we may earn a commission at no extra cost to you. See our affiliate disclosure.
Published · Last updated